Sanctissimus Shrine: Six Trials & the Paladin Duel
Solve all six Sanctissimus combat trials, switch attack types for Yakhanati, stop the Gargoyle revival loop and prepare Rain for the Paladin duel.
Chapter 6 · six monster trials and Paladin duel
Source-compared encounter conditions, effective elements and response to named mechanics. No copied stat table, fixed turn guarantee or claim of independent gameplay testing.
On this page
What opens the inner chamber?The six monster trials in orderHow do you stop the Gargoyles returning?Prepare Rain for the final testGelidus is a separate full-party battleSources & reviewWhat opens the inner chamber?
Clear the six monster trials, then complete Rain and Lasswell’s Paladin duel. Read each stele before its corresponding battle. A single strong elemental loadout is not the solution to every inscription.
Enemy HP differs between the reviewed references, so this guide does not publish a universal threshold, recommended kill turn or difficulty-independent stat table.
The six monster trials in order
| Trial | Effective approach | Failure condition to avoid |
|---|---|---|
| Archaeoaevis | Check its current weakness after Barrier Shift. | Repeating the opening element after the affinity changes. |
| Dad Bomb | Use Fire and prepare a finishing opening as HP falls. | Leaving the party exposed to Explode. |
| Test Rider | Earth or Light; respond to its calm and furious states. | Assuming its damage and defenses stay unchanged. |
| Yakhanati | Wind or Dark, switching between physical and magical categories. | Attacking into the currently ineffective category. |
| Two Arch Gargoyles | Wind or Light; bring both close enough for a coordinated finish. | Allowing the surviving partner to revive the first. |
| Dragon | Lightning, with recovery ready for its breath warning. | Spending the healer’s last safe action just before the burst. |
How do you stop the Gargoyles returning?
Watch both HP bars. Prepare damage that can finish the pair within the same opening, rather than defeating one while the other remains far from death. Multi-target damage can help when it is actually available; selecting a single-target command does not spread the hit automatically.
For Yakhanati, the physical/magical distinction still matters even when both attacks use an effective element. Read its changed state instead of concluding that the listed element was wrong.
Prepare Rain for the final test
The Paladin duel uses Rain alone, so check his equipment, commands and recovery items. A healer or defensive Vision equipped on a different party member cannot participate for him.
Treat the duel as its own encounter and story transition. Do not rely on breaking a normal monster-sized Stagger gauge or importing the six-trial rotation. Continue through both parts of the confrontation and let the Paladin scenes finish.
Gelidus is a separate full-party battle
After the duel, the party returns for Gelidus. Recheck formation and Fire access before proceeding. The completed monster trials and Paladin title are the progression conditions; no extra shrine key is required. The Gronoa chapter guide covers the route into and out of the shrine.
Sources & review
Sources checked on 26 October 2026. This is a source-based guide, not a claim of independent gameplay testing. A specific patch number has not been verified. Read our editorial policy.
- FF Resonance Wiki — shrine trials encounter mechanicsIndependent guide; selected mechanics, not a copied stat database
- FF Resonance Wiki — lasswell encounter mechanicsIndependent guide; selected mechanics, not a copied stat database
- Player Atlas — chapter 6 routeIndependent guide
- RPG Site — story walkthroughIndependent guide
Continue your journey
Combat & Stagger
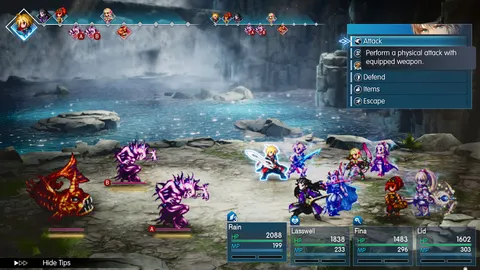
Read the action timeline, compare HP and Stagger damage, understand Sweeping Stagger and choose the right moment for your Vision's Resonance.
Open guide
Boss guide hub
Find 57 encounter guides by story chapter, enemy, element or mechanic, including all 15 Cave Masters and all 12 Legendary Arms trials, with story rematches kept distinct.
Open guide
Lasswell — The Twin Titleholders
Complete Lasswell’s personal quest: find the Gaberada witnesses, recover an adamandelion shell near Olderion and visit Lost Cave.
Open guide
Chapter 6 — Gronoa & Sanctissimus Shrine
Learn Holy with the White Jade Stone, cross Gronoa’s miasma, defeat Lux and Elfdrit, clear the six shrine trials and finish Gelidus.
Open guide